Always use base iso for critical dynamic range situations: This might be obvious for most people but a lot of Fujifilm photographers (including myself) have been in doubt about this because of the “Dynamic Range feature (100%, 200%, 400%) on Fujifilm cameras. This feature claims better dynamic range when increasing iso to 400 or 800, and setting the “Dynamic Range” to 200% or 400%. It does increase the dynamic range but not as much as shooting at the cameras base iso does. For X-T3/X-Pro3 base iso is 160, for older cameras base iso is 200. Check out this chart that shows different cameras dynamic range. For some reason Fujifilm automatic sets the iso (even in good light condition) to one stop over base iso (even though you set the preferred iso aka “default sensitivity” to your base iso), so you need to be more aware of this on Fujifilm cameras.
Use Capture One for more sharpness and details: You probably already heard this, but like me you didn’t believe it and ignore it. But there is a huge difference. Files look identical to Lightroom/Camera Raw when opened up but it’s when you add sharpness or remove noise reduction you see the huge difference. Now I use both Capture One and Adobe Camera Raw, I like the colors from Camera Raw better but the photos that need extra sharpness I use Capture One.
Improved OIS/IBIS performance: Your camera has two stabilization settings. The default “Mode 1 Continuous” means that it’s always on, also when you look at the screen. The problem by that is that when you take a photo the stabilization motors might not be in the best possible position. If you set it in “Mode 2 Shooting Only” the stabilization will only be activated when the shot is take. Tests by many have shown that this gives sharper images. The downside is that looking at the screen might look more laggy and less smooth. The setting can be changed in the menu -> Shooting Setting -> IS Mode -> Continuous.
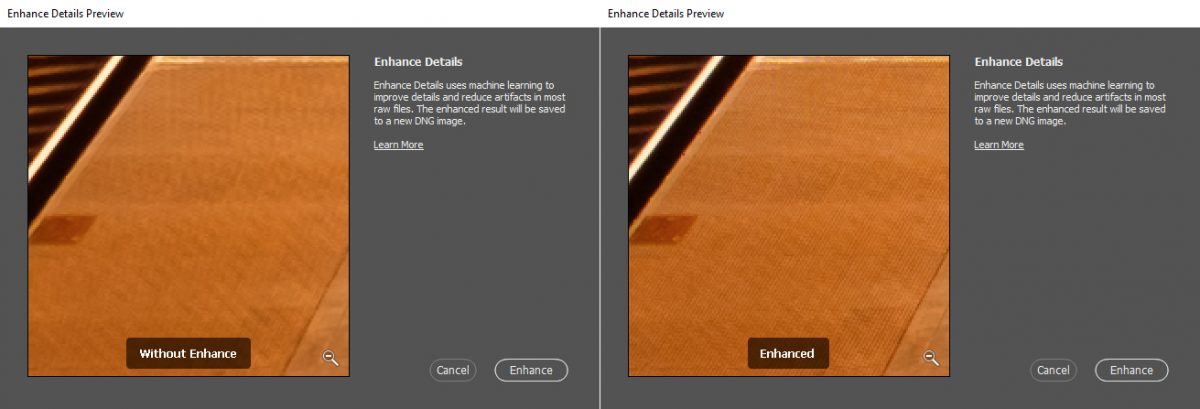
Enhanced Details feature in Lightroom/Camera Raw for extra details from Fujifilm X-Trans files: The X-Trans sensor in Fujifilm X cameras are very different from traditional Bayer sensors. It requires more guessing from the Software because of the placement of the of the color pixels on the sensor. Adobe have with machine learning improved this guessing process, but since it requires more processing power you have to do it manually for each photo. Right click the image in the right side, and select “Enhanced Details”. This will create a new dng file next to your raw file with the enhanced version and also copies your existing adjustments. I still think Capture One beats it when it comes to sharpness (I think because the sharpness/noise reduction algorithms are better) but it’s still a useful feature.
Electronic Front-Curtain Shutter on X-H1/X-T3: If you own these cameras you can enable this feature from the menus -> Shooting Settings -> Shutter Type -> Select EF (Electronic Front-Curtain Shutter only) or EF+M+E (mixing between all shutter types, using EF for slow shutter speed situations that can give shake, using mechanical for faster shutter speed, using electronic shutter for faster shutter speeds than the mechanical can handle. Preferred mode for me). It gives less camera shake by having the shutter open when the photo is taken and using electronic shutter, only for closing the shutter the mechanical shutter is used. It doesn’t give the same downsides as using electronic shutter only like bending, but gives less vibration and more silent shooting. Downsides are reported to be possible worse bokeh (there is a slightly difference but I don’t think it’s worse) and uneven exposed image (I found this problem on my Sony A7R II but not on my Fujifilm X-T3 or X-H1).
IBIS + OIS = Super stabilization: If you own a camera with IBIS (currently only the X-H1) and a lens with OIS, they can work together and give you even more stabilization. I have been able to go all the way down to 1/1 sec handhold and get sharp photos. It requires that your X-H1 firmware is up to date.
Watch your shutter speed when shooting people: Use 1/250 or above when take photos of people. Even if they are standing still they still they still move a tiny bit. The photos might look sharp on your camera but when you see them on a big screen they are not 100% sharp. If you shoot in low light and need to go with a lower shutter speed make sure to take many extra shots.
Setup your preferences for better jpgs: Fujifilm cameras can produce some beautiful jpg’s that can save you time editing in front of your computer. Settings can be made in the menu under Image Quality Settings (page 2). This is the settings I currently use:
Profile: Provia
Color: +2
Highlights: -2 (or -1, this will save your highlights from being blown out)
Shadows: 0 (still like some contrasty shadows so keep it at 0)
Sharpness: +1 (or +2 for even more)
High performance mode: Most Fujifilm users are aware of this but if you are not, your camera is by default not set to high performance mode, this give you more speed but also less battery life. Enable it by going to the menus, Set Up -> Power Management -> High Performance On
Capture One Fujifilm Color Profiles for older cameras: If you want to use color profiles like Provia, Velvia for older Fujifilm cameras (X-T1, X-T10, etc.) in Capture One, then here is a guide for how to download the profiles manually.
Check raw samples before buying lenses: A lot of websites like DPReview.com and photographyblog.com shares raw sample files for download when testing camera lenses. Instead of buying a lenses and later selling it again because you didn’t like it, try to download some raw samples, try editing them in Lightroom and see if you like it. Wish I had done that earlier.
Edit: I recently made a blog post with raw files from all Fujifilm cameras I have used here.
Underexpose and overexpose in the right situations: Fujifilm X cameras don’t have the best dynamic range and iso noise compared to full frame or medium format cameras (in my opinion the biggest weakness of Fujifilm X cameras). So exposing your photo correctly and not blowing out highlights is important.
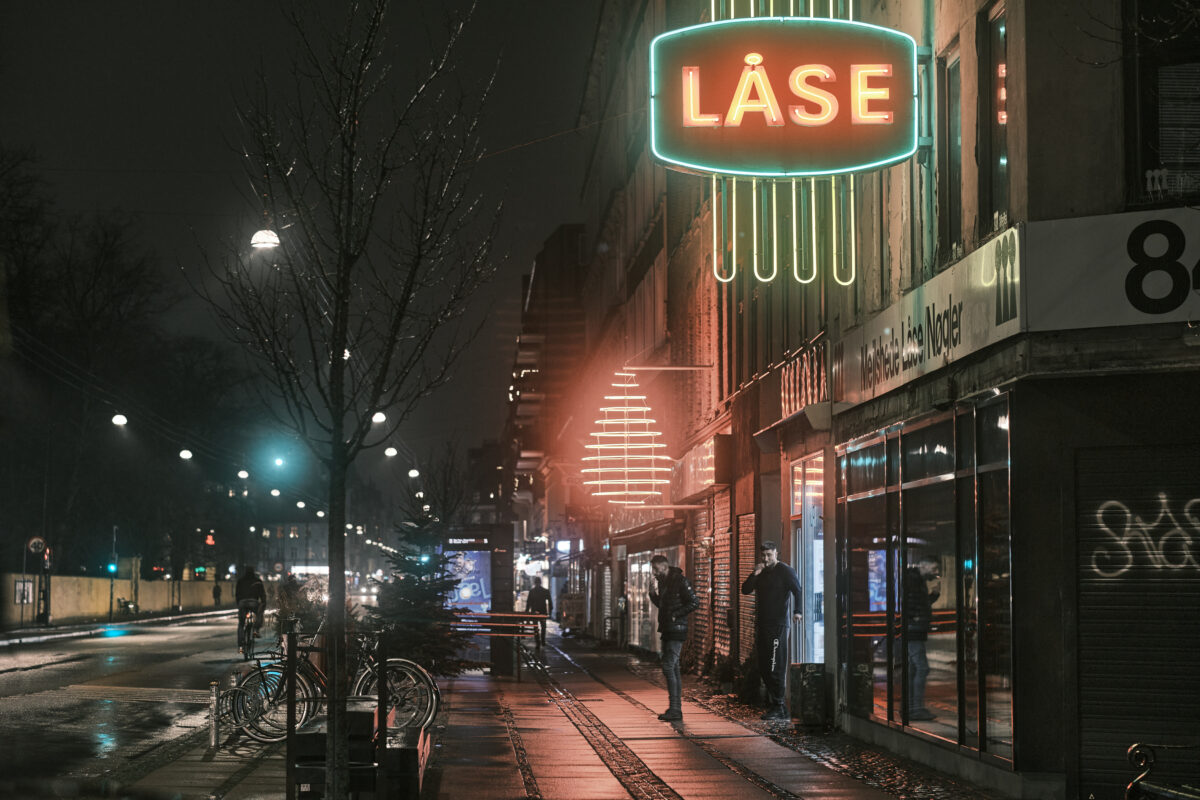
In night time photography I often underexpose 2/3 to 1 stop. You can often raise the shadows later without noticing , but if you blow the highlights the photo will look terrible.
For photographing show scenes you have to overexpose 2 stops, all the white will make the camera want to underexpose so you have to manually correct for it.
Prevent Auto Cropping in Capture One: For some lenses Capture One will automatic apply lens correction, making lines in your photo look more straight. It’s great for some things, but it also crops the photo and stretches the pixels for reduced quality. You can disable this under Lens Correct -> Distortion, turn it to 0.
0 means it’s disabled, 100 or more mens it’s turned on.
Notice that a lot of high quality Fujifilm tele lenses doesn’t need correction, mostly wider lenses and zooms.
Fix hot pixels: Have you ever shoot a long exposure shot and noticed single white pixels on your photo? It happens for older camera when the sensor gets hot (long exposure). Cover the sensor by putting on your camera end cap. Go to the Menu -> Image Quality Settings -> Pixel Mapping. Run it and the camera will find those pixels and map them to other nearby pixels.
Peak Design anchors on Fujifilm cameras without the flimsy metal straps: If you use the Peak Design Anchor system for shoulder straps this is a useful tip. Inside the holdes where you put the metal straps on the camera, you can force out some small metal pieces that will give you more room to to fit the Peak Design anchor. Check out this Youtube video for more info.
Smaller Eye Cup for Fujifilm X-T1/X-T2/X-T3/X-H1: Personally I think the eye cup for these cameras are too big and flimsy. The rubber can easily get cought on something and break, and it makes the camera look much bitter than it actually is. I recommend buying the add on Fujifilm EC-XT S eye cup, it’s smaller and is pretty cheap.
Don’t use focus peaking, use zoom in button to achieve manual focus: I used focus peaking for years myself and was very often very disappointed. Focus looked good on the camera, you get home to your computer and realize that the photo was not in focus. I recently realized that a lot of manual focus shooters just use the zoom in button to find focus, and using it fixed my problem.
Previewing a super underexposed photo: I often underexpose my night time photos, when I try to save the highlights from blowing out. In rare cases the highlights are so bright that I end up underexposing minus 3-4 stops. The problem is that it’s hard to preview your photo when you underexpose it so much. You can set shadows to -2, but that’s not enough. The trick is to use a flat film simulation like PRO Neg. Std. or Eterna. Later you can then edit your raw files on your computer with your favorite film simulation and recover the shadows -4 or more.
